
So far you’ve seen the progress photos for my daughter’s Birthday Princess dress, but what’s a princess party without a castle cake? I knew I had to make one, so I started collecting fondant cutters and images of pretty cakes several months before they’d actually be needed.
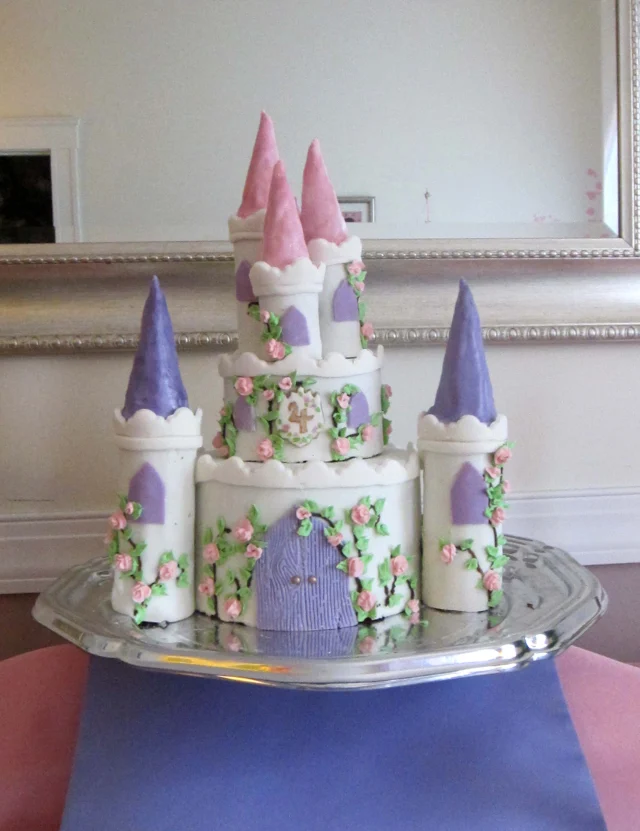
After much vacillating I decided to make it a two-tier round cake with two towers at the base and three on the top tier. Since there was plenty of leftover cake last year, I kept the same sized pans as before– 7″ on the bottom (three layers) and 5″ on the top (two layers). Color scheme would be white, pink, and purple, and I’d decorate it with climbing roses and lacy crenellations.
Fair warning, this is not a tutorial post– the process was so involved that I just couldn’t take the time to get pictures of every step and post recipes and instructions for all of the components. I may do individual posts on some of the techniques, though. So for now just sit back and enjoy the pictures and general instruction summary!
Since my daughter is a huge fan of chocolate, I used my standard one-bowl chocolate cake recipe for the layers. Usually it makes two relatively thin 9″ round layers, so doubling it made for three thicker 7″ layers and a double-height 5″ layer, with some batter to spare. I put together a 3D layout using cake pans and other stuff to get a general idea of the design I’d use.

The cake layers were filled with a raspberry swiss meringue buttercream, which I made by whipping up a batch of regular swiss meringue buttercream (did you know that the whipping of egg whites is strictly an optional step? It’s so much easier this way! Recipe to be posted later.) and beating in a few spoonfuls of canned raspberry pie filling.
After the layers were stacked, I covered them in chocolate ganache (2:1 chocolate to cream mixture, and it holds up better than frosting under fondant, especially over long periods of time) using the upside-down method.

I let the ganached cakes sit at room temperature overnight to set, then covered the cakes in marshmallow fondant, trying my best to keep those sharp edges. It didn’t work so well, honestly– the sharp edges ended up making my fondant tear a little right at those spots, and tiny bits of ganache kept finding their way onto the white fondant surface, staining it brown. So annoying!
The five towers were made of rice krispie treats, made with partly-crushed cereal to make them denser and smoother, and only 1/3 the original amount of butter to keep them firm. I crammed the warm mixture into parchment-lined PVC pipe (1.5″ diameter for the small ones, 2″ diameter for the large ones) and tamped it down with a tart shaper tool to make the cylindrical shapes. I let them dry in there overnight and then took them out to dry further. It took slightly more than one recipe’s worth (10 oz of marshmallows and 6 cups of cereal) to make the towers, though if I’d known ahead of time exactly how tall they needed to be I probably could’ve done it with just one recipe.

Then I used a serrated knife to cut them to the perfect height (and to make nice flat bottoms), and covered them in additional ganache and then with more fondant. The pointed roofs were made of ice cream cones, covered in more ganache and fondant. I’d originally planned on making little shingle shapes for them, but adding so many layers of fondant made the roofs too fat for my design, so I just went with a basic covering and painted it with some luster dust and vodka to make it look shimmery. I put some edible glitter on, too.
While the parts were still separate and easy to deal with I added fondant details, including windows, a woodgrain-textured door, crenellations (rolled those a bit thicker than usual), and a plaque with a gold number 4 on it (she’s turning 4, after all).


I glued everything on with “fondant glue” made by microwaving some extra fondant with a little water and stirring to get the texture right. It worked quite well for keeping things in place, and I didn’t have to buy or make anything extra!
Then, because there were multiple small cracks, rough spots, and ganache stains on the white fondant surface, I piped brown vines and green leaves in royal icing over strategically-chosen spots, and stuck on some pink royal icing roses I had leftover from a previous cookie project. It worked great for decoration and for disguise.
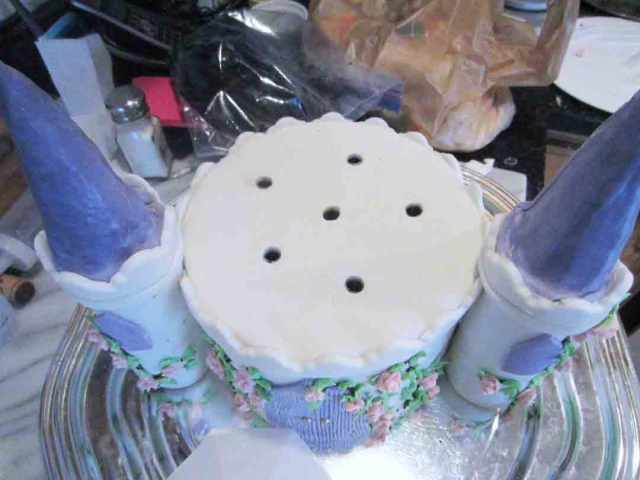
When it was time to assemble everything, I used large-diameter bubble tea straws stuck into the bottom tier to support the top tier, and toothpicks to attach the towers to the top. The side towers weren’t fastened at all, just propped up on the sides of the bottom tier.
It turned out absolutely beautiful. I’d been worried when there were so many little fondant issues with the base layer, and the fondant didn’t go on perfectly smooth for the ice cream cones so they looked kind of bumpy, but in the end those things didn’t matter to the overall impression. So pretty!

Notes:
- PVC pipe is the best tool for castle turrets ever. It comes in several diameters and a good hardware store will cut it for you at no charge. I ended up paying a grand total of $1.70 for my five pieces of PVC, which was far less expensive than trying to find something else to shape the rice krispie treats. You could also try just rolling the warm mixture into a tube, or cutting identical rounds and stacking them, but this seemed like the easiest way.
- The great thing about ganache under fondant (other than its stability) is that it allows you to leave your cake at room temperature throughout the whole decorating process. If you refrigerate a fondant-covered cake, it’ll start condensing moisture on the surface once you take it out again and you’ll need to let it all evaporate before doing anything else to it. With ganache, I was able to leave the cake on the countertop overnight with no trouble.
- Remember that it’s easier to warm ganache than it is to chill ganache (the fridge or freezer takes forever and the ganache set unevenly). So err on the side of too cold if you’re microwaving your ganache to spread. You can always use the hair dryer to warm up the surface a bit and stir. The hair dryer also works great if your ganache hardens while you’re still smoothing it onto your cake.
- Unlike buttercream, set ganache doesn’t have enough moisture to really hold the fondant in place, at least not on vertical surfaces. You can spritz it with water, or do what I did and rub a thin layer of shortening over the ganache. It worked well.
- Bubble tea straws are available at most grocery stores these days, and they’re made of sturdy plastic about 1/2 inch in diameter. They’re perfect for supporting multi-tiered small cakes, as they’re easy to cut to size and support lots of weight. Plus, unlike dowels they don’t displace any cake so they won’t distort the shape of your cake no matter how many you put in.

That’s one lucky princess!
LikeLiked by 1 person
Gorgeous!!! What will you make for her 5th birthday?!? 😊
LikeLiked by 1 person
Fantastic! I love the rose vines!
LikeLiked by 1 person
This turned out beautifully! I’ve been looking for an excuse to do a castle cake – love the rice krispie towers!
LikeLike
Pingback: Swiss Non-Meringue Buttercream | It's All Frosting...
Pingback: Kitty-Ear Headbands | It's All Frosting...